

7 Acrylic Nail Sculpting Techniques for Beginners
Quick Summary
The seven acrylic nail sculpting techniques for beginners covered here are the free-edge apex build, pinch-and-press sidewalls, bead ratio control, tip-over-form extension, pink-and-white layering, stiletto and coffin shaping, and smile line refinement. Most acrylic failures start during prep, so a clean, dry, properly prepped natural nail comes first. Practicing on a training hand builds control before you work on a client.
- Most acrylic failures start before the first bead, so prep the natural nail carefully.
- Build the free-edge apex with a nail form and a fine kolinsky brush for control.
- Dry beads trap air and cause bubbles; add a touch more monomer if the bead crumbles.
- Keep product off the cuticle and skin, since product touching skin causes lifting.
- Practice on a training hand before working on a client.
Table of Contents
- Preparing the Natural Nail and Gathering Your Supplies
- Technique 1: The Free-Edge Apex Build Using a Nail Form
- Technique 2: The Pinch-and-Press Sidewall Method
- Technique 3: Mastering the Acrylic Nail Bead Ratio for Consistent Shape
- Technique 4: The Tip-Over-Form Extension for Length
- Technique 5: Pink-and-White Layering for a Natural Finish
- Technique 6: The Sculpted Stiletto and Coffin Shape Build
- Technique 7: Refining the Smile Line and Cuticle Area
- Frequently Asked Questions
Preparing the Natural Nail and Gathering Your Supplies
Most acrylic failures start before the first bead touches the nail. A sound application depends on a clean, dry, properly prepped natural nail and a stocked bench.
Start with a clean bench. The Dappen Dish Glass Clear With Lip is a clear, durable glass dish with a convenient pouring lip to prevent spills.
Prep the natural nail by gently pushing back the cuticle, removing oil or debris, and lightly buffing to remove shine. Apply a dehydrator and primer where the system calls for them. CND Nail Prime Primer 0.5 Oz is an acid-free primer, and its instructions advise coating the nail plate evenly up to the cuticle.
Gather your core supplies before you begin:
- Acrylic liquid (monomer) and powder, matched to the same system
- A kolinsky brush in a size that suits your nail width
- Nail forms or tips, depending on the technique
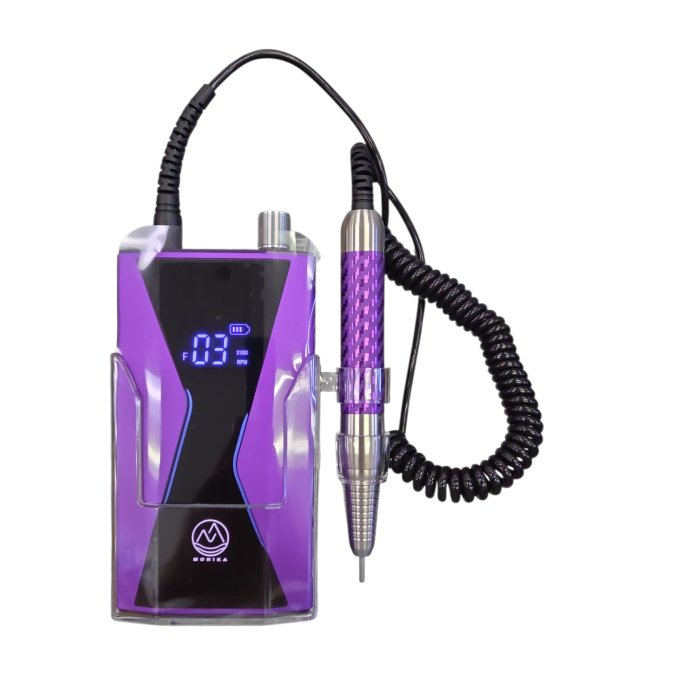
- A nail drill, if you plan to refine shape and remove excess
- A practice finger for warm-up work
Beginners often skip the practice finger. Practicing bead placement on a training hand, such as the DL Pro Adjustable Practice Finger Set, builds control before working on a client.
Work in a ventilated space and keep a clean paper towel nearby to wipe brushes between passes.
Technique 1: The Free-Edge Apex Build Using a Nail Form
The apex is the highest curve of the nail, and placing it correctly determines how strong and natural the finished nail looks.
Attach the form snugly under the free edge, centered and level with the natural nail. Dip your brush into monomer, then powder, and place a bead near the cuticle.
Use a kolinsky brush with a fine point for control, since the right tool makes acrylic nail sculpting techniques like this one far more precise. The Petal Kolinsky Acrylic Nail Brush Blue Marble Size 22 suits larger nails, while the size 12 version works well for narrow nails and detail work.

Common mistakes include placing the apex too far forward, which looks bulky, and building too thick at the center. Aim for a gentle arch and consistent side-to-side thickness.
Technique 2: The Pinch-and-Press Sidewall Method
Sidewalls define the nail's width and symmetry.
Place a bead along one sidewall near the cuticle and gently press it toward the edge with the brush tip.
Check symmetry frequently by viewing the nail straight on. Uneven sidewalls are among the most visible flaws in finished work and are easier to fix early.
Watch out: over-pressing near the cuticle pushes product onto the skin, which can cause lifting or irritation. Keep the bead just short of the cuticle area.
Technique 3: Mastering the Acrylic Nail Bead Ratio for Consistent Shape
The bead ratio, meaning how much liquid you mix with powder, controls how the bead behaves. Too much liquid makes the bead runny and hard to shape. Too little makes it dry, grainy, and difficult to spread.
Dip the brush into monomer first, then pick up powder. A well-balanced bead holds its shape on the brush and sets without pooling. The Harmony ProHesion Nail Powder Crystal Clear and the Harmony Gelish ProHesion Acrylic Nail Sculpting Liquid are formulated to work together.


Work the bead promptly.
Diagnose the bead by its symptoms
Most beginners learn ratio by feel, but you can shortcut that by reading the bead's behavior:
-
Bead looks dry, crumbly, or drags instead of flowing: too dry. Add a touch more monomer and pick up powder in smaller amounts. Dry beads trap air and cause bubbles.
-
Bead flattens and loses apex: too much liquid relative to powder, or you are pressing rather than floating the bead. Let it self-level and guide it with the brush tip.
Practice drills with measurable pass criteria
Rather than practicing until it "feels right," set concrete targets so you can tell when bead control is ready for a client:
- Ten-bead consistency drill: place ten same-size beads on a practice finger or tip. Pass when all ten hold their shape on the brush for a count of three and none pool or crumble.
- Apex placement drill: build five free-edge apexes on forms. Pass when the apex sits at the same point on each nail and side-to-side thickness is even straight on.
- Cuticle clearance drill: apply beads near the cuticle on a practice finger. Pass when no product touches skin and the gap is consistent across all five nails.
- Working-window drill: time yourself shaping a single bead. Pass when you can place, guide, and refine it before it stops moving under the brush.
Technique 4: The Tip-Over-Form Extension for Length
Extensions add length. The tip-over-form method attaches a form first, then sculpts the extension over it, which gives you control over length and angle while maintaining a natural base.
When to choose tips, forms, or tip-over-form
Beginners often treat these as interchangeable, but each suits a different situation:
- Nail forms alone: best when sculpting the entire extension and controlling the apex from scratch. Forms demand steady bead control and are less forgiving on very short or damaged nails.
- Tips alone: best for quick length on healthy nails with a clear free edge. Tips reduce sculpting time but add a blend line to refine, and a poorly blended tip commonly causes lifting.
- Tip-over-form: best for tip-guided length plus form-supported structure. The form holds the extension while you build, helping beginners keep the angle consistent and reducing product running underneath.
Choose tip-over-form when the natural nail is short, when you need a predictable length and angle, or when you are still building confidence with free-form sculpting.
Step-by-step mechanics
- Prep and size the tip. Prep the natural nail as described earlier, then select a tip that fits sidewall to sidewall without overhanging. Too wide presses on the sidewalls; too narrow leaves gaps that collect moisture.
- Attach the form first. Fit it snugly under the free edge, centered and level with the natural nail. The form becomes your support and guide for the extension's underside.
- Bond and blend the tip. Apply the tip per your system's adhesive instructions, then blend its contact area into the natural nail so there is no ledge. A visible ledge catches files and product and is where lifting usually starts.
- Build the stress zone first. Place your first bead at the stress area where the tip meets the natural nail. Build it slightly thicker than surrounding product, then feather it out.
- Extend over the form. Add product over the form to create the extension, keeping the angle consistent with the natural nail. Let each layer partly set before adding the next if your system requires it, to prevent thick, unstable buildup.
- Refine the apex and sidewalls. Once set, refine with a file or drill, checking symmetry straight on.
Trade-offs and troubleshooting
- Extension angle droops or lifts: the form was not level with the natural nail, or the stress zone was built too thin. Recheck form placement and add structure at the stress area.
- Visible seam at the tip blend: the tip was not blended flush before product was applied. Blend fully before building.
- Product runs under the form: bead too wet or form not sealed against the free edge. Use a drier bead and press the form snug.
- Extension too long: beginners often overdo length, which weakens the nail. A moderate length is easier to maintain and looks more natural.
Practice on a training hand to get comfortable with the angle and length. Pass criteria: the extension angle matches the natural nail on all five fingers, the stress zone is visibly reinforced, and no product has seeped under the form.
The tip-over-form method suits beginners who need predictable length and angle, and the article compares it with the other options.
| Method | Best for | Key difference |
|---|---|---|
| Nail forms alone | Sculpting the entire extension | Demands steady bead control; less forgiving on very short or damaged nails |
| Tips alone | Quick length on healthy nails | Reduces sculpting time but needs a blend line refined |
| Tip-over-form | Tip-guided length with form support | Form holds the extension and keeps the angle consistent |
Technique 5: Pink-and-White Layering for a Natural Finish
Pink-and-white acrylic uses pink powder for the nail bed and white powder for the free edge, creating a natural-looking French-style finish. Layering requires a clean transition between colors.
Apply the pink powder first across the bed, then add white powder at the free edge, blending the seam gently with the brush. The Harmony ProHesion Nail Powder Crystal Clear can work as a clear base layer where a smooth, natural finish is the goal.
Technique 6: The Sculpted Stiletto and Coffin Shape Build
Stiletto and coffin shapes are dramatic and require strong structure.
Build the shape in stages. Establish the base and apex first, then refine the sidewalls to create the taper.
Keep the taper even on both sides. Asymmetry is most visible on pointed and squared shapes. Use a fine kolinsky brush for detail work and a nail drill to refine the final outline.
Technique 7: Refining the Smile Line and Cuticle Area
The smile line is the curve where the nail meets the free edge at the front.
Refine the smile line with a fine brush and light pressure. Clean up any product that has crept onto the cuticle or skin, a common cause of lifting.
Keep your application away from the skin. For removal, Pure Acetone Nail Remover 1 Gallon is listed for use on acrylics and gel polish; note that this item is listed for in-store pickup only.
Frequently Asked Questions
How do beginners sculpt acrylic nails?
Beginners start by prepping the natural nail, applying a primer, and placing a nail form. Dip the brush in monomer, pick up a small bead of powder, and place it at the apex, then press and guide it toward the free edge. Work in thin layers, keep the bead slightly wet, and refine the shape before the product sets. Practicing on a practice finger set, such as the DL Pro Adjustable Practice Finger Set priced at $8.50, builds control before working on clients.
What tools do you need to sculpt acrylic nails?
The core kit includes a kolinsky acrylic brush, a dappen dish for monomer, acrylic powder, nail sculpting liquid, nail forms, a primer, a dehydrator, and a file. A 25000 RPM electric drill with bits helps with shaping and cleanup. Beauty Zone Nail Supply carries the Petal kolinsky blue marble brush in size 22 at $32.50 and size 12 at $25.00, the Harmony ProHesion Nail Powder Crystal Clear at $5.00, and the Harmony Gelish ProHesion Sculpting Liquid at $12.00. Always keep acetone and a glass dappen dish on hand for cleanup.
What is the acrylic nail bead ratio and why does it matter?
The bead ratio is the balance of liquid monomer to powder on the brush tip. A well-balanced bead is wet enough to flow into shape but firm enough to hold its form. Too much liquid causes sagging and flat, thin edges, while too little causes lumps and bubbles. Practice picking up beads on a dappen dish and adjust by feel until each bead holds its apex without slumping.
How do you prevent acrylic nails from lifting?
Lifting usually starts with poor prep. Thoroughly cleanse and dehydrate the natural nail, then apply a primer such as CND Nail Prime, which is priced at $9.50, and allow it to dry fully before sculpting. Keep product off the skin and cuticle, and avoid flooding the sidewalls.
